Push Notifications
Push Notifications are created, viewed and sent from your Safer Schools Scotland Web Management Portal. Users can find any notifications they've missed or want to revisit by clicking the notification bell icon at the top of their screen throughout the App.
This article will take you through the steps of creating your first one, sending them, and seeing your previous notifications.
Creating a Push Notification
STEP 1 Once logged into your App Portal, select Push Notifications on the menu, then select Create Push Notifications.
if choosing to send to pupils.
 If you're attempting to push to content within the App that is role specific, such as an article in the News Builder or a Survey, roles will automatically be assigned to your Push Notification. You won't be able to send the content to a role that can't already see it.
STEP 3 Next, give your Notification a Title and a Body.
The title should draw attention, whilst the body should offer a little more information. The title has a character limit of 40, and the body 200, so keep them brief and to-the-point!
STEP 4 Scroll down and chose where you want to direct the user within the Safer Schools Scotland App. You'll notice these all lead to difference sections of your App. In some cases, you'll have the option to paste a link, in others it will be as simple as heading to the assigned section.
Sending Your Notification
Once you've added all of the above details, it's time to send your Push notifications. This is done at the bottom of the Create Push Notification page where it says Schedule. You have two options here:
NOW: This will send your notification to your App users immediately. Once the NOW option is selected, click Send at the bottom.
LATER: This will allow you to 'queue' your notification for a later time in the day or even on another date. This allows you to queue all of your notifications for the week on the Monday for example. Once you've selected the date and time, click Schedule at the bottom.
 Viewing your Notifications
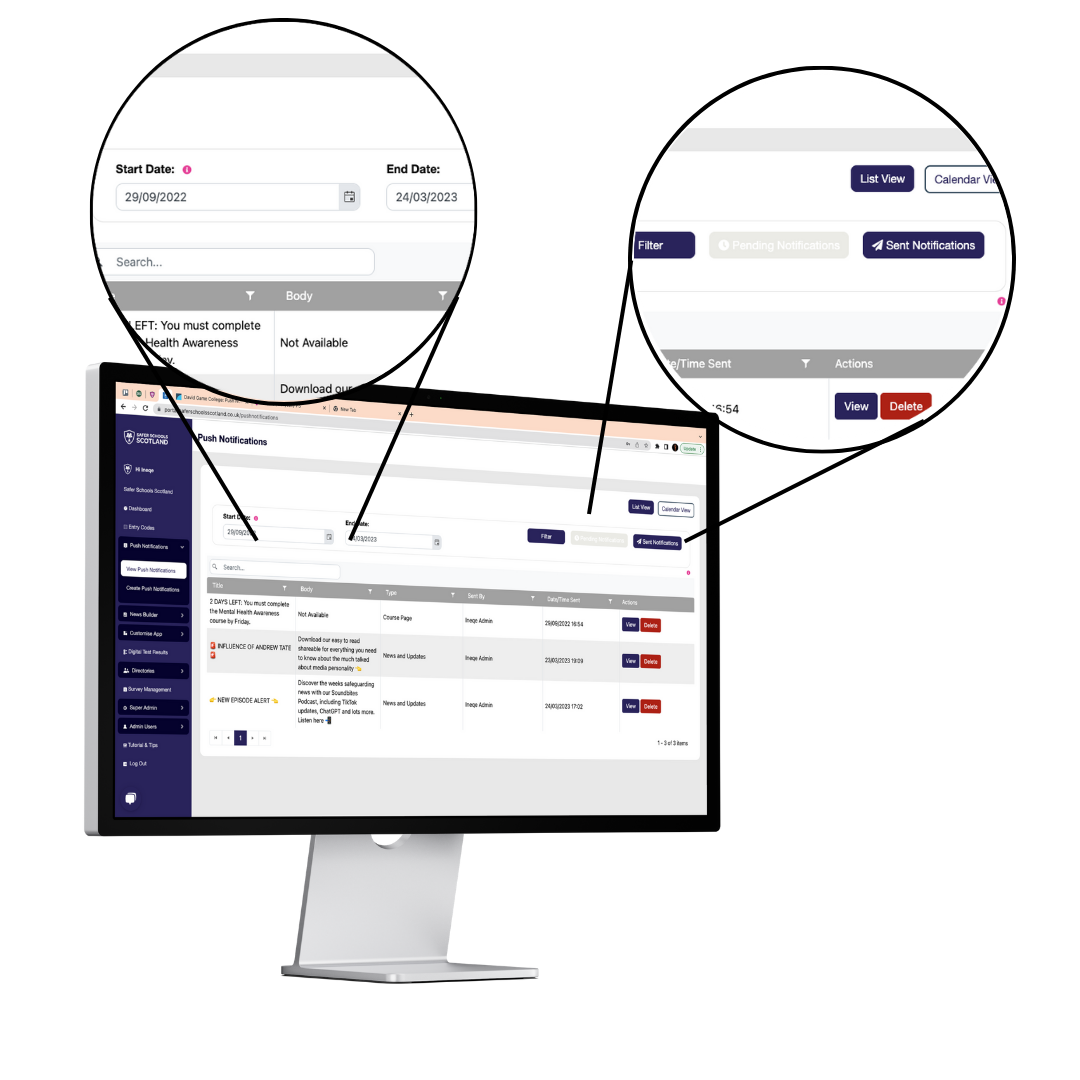
Once they're sent/scheduled, you're able to view past and pending Push Notifications by clicking View Push Notifications under Push notifications in the left hand sidebar on the portal.
You have a number of filter options too, as can be seen below. This is at the top of your View Push Notifications screen. You're able to filter your notifications by date, contents (such as title, or body of the notification), sender, type or exact date. Here, you're also able to View or Delete previous notifications.
Creating a Good Notification
Consistency
Your users will receive regular push notifications from the Safer Schools Scotland App containing safeguarding updates, alerts and blogs. It can therefore be important to differentiate any push notifications sent out directly from the school or local authority. Try and keep your Title's and bodies used similar, using similar structure and language to help differentiate. You could even use your school or LA name at the beginning of the Notifications.
Clear and Concise
Push notifications have a 125 character limit in the Body, and only 25 for the Title. It is important to make your push notification clear and concise. We suggest include what a post relates to in the title, for example if its the latest handbook at the start of term, titling it New Handbook Update! would be great! You could even include a book emoji 📘 or an exclamation mark emoji❗if something needs urgent attention.
Other Considerations
1. Is it timely? You can schedule a push notification for a specific time or date to ensure it has the best engagement. For example, PN's to busy parents first thing in the morning might get lost in the start of their day, but it might be ideal for a older pupil as they're heading into school for the day.
2. Is it actionable? The push notification should make it clear what the user should do next. For example, if you are wanting to inform staff of a Safeguarding Risk, include a link to an article within your Safer Schools Scotland App that would give them guidance on what action to take next
3. Is it Specific? You can send the push notification to a specific user role. Ensure the contents of a PN is appropriate to the group you're engaging with. For example, telling the boarder's parents about roadworks on Jewry Street may not be relevant as they shan't be picking their children.
4. Variety! Ensure you're using all options for Push Notification Pathways within your Portal when sending notifications.Your users must have notifications enabled on their device from the Safer Schools Scotland App. Find instruction and information about notification permissions here
Still feeling unsure?
and use the Live Cha
Related Articles
Push Notifications Troubleshooting
If you're not receiving push notifications, there is No Need To Delete The App. Simply follow the guidance below to attempt to resolve, and if you're still having difficulty please contact the service team on the details provided. If you've found ...Questions about the NEW Safer Schools Scotland App upgrade!
Safer Schools has recently moved from the app on the left, to the app on the right. With this move, the App is now called Safer Schools Scotland. There are improvements, new features, courses and content. How can I get the new app? Download the app ...The Safer Schools Scotland Web App
Your Safer Schools Scotland App can now be accessed anytime, anywhere! You can now access the App through any device with an internet browser. You will only be able to gain access to the Web App if your school is already registered for the Native App ...Reseting your Portal Password
Only School Account Admins have access to the Web Portal. Your log in information is contained on the original welcome email you recieved when your school were first onboarded. if you were added as an admin, your password was set but the person who ...Change your Portal Password
Changing you admin account password in the Web Management Portal is simple. Step 1 Log in the Portal using the information from your Welcome Email or using the details given to you by and existing admin if they've added you to the account Step 2 ...